I'm a senior in high school and one of my electives this half if the year is 3D Design (basically sculpture; it was Computer Graphics the first half, which is basically Photoshop). Pretty much all we do is make whatever we want using a bunch of different materials supplied. And I mean anything.
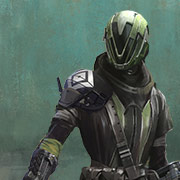
My project? A Vex Mythoclast.
My teacher thinks it may be difficult but believes I can do it. He's also a gamer which helps (doesn't play Destiny, but still. I doubt any other teacher would let me build a game replica).
It's pretty much all cardboard and hot glue and will take ages I complete, but I thought I'd share it with the community. I'll post WIP pictures if you guys are interested, and completed pictures in a few months when I'm done. I've almost completed the basic frame and will soon begin building on that.
Just thought I'd share this because I thought you guys would be interested to see how it goes!
[b]Edit[/b]: For those questioning why I'm allowed to do this, it's because the Vex is such an abstract design and looks nothing like any actual weaponry. It's a scifi gun from a video game made of cardboard.
[b]UPDATE[/b]: So, it's been a while and I haven't had time to post pictures so far. I have a few on my phone of early progress and some recent ones where I'm nearing completion. Not the best pictures or good as far as documentation of the whole process, but I have some and will try to post today. I can also take another on Wednesday (next class) and ill try to get some close-ups detailing the process of each section at some point.
[b]UPDATE[/b]: Got the pictures uploaded to Imgur for everyone waiting! Here are the links:
http://imgur.com/FluDXJr
http://imgur.com/DGTlj76
http://imgur.com/sVxiaIT
The first is the very basic, incomplete frame (two sides that were glued together with a "skirt" to make a rectangular tube frame) and the second is the assembled frame with a handle added on (where I first started adding on). I later chopped of the end to insert a barrel (stupid move making the frame too long- I had to saw it off. Found a tube that fit perfectly, though!) as seen in the final picture from Friday, the 20th.
The final picture shows the whole front portion completed and the middle. That tape on the magazine and upper area creates a nice slope (connecting two pieces of cardboard- it's sort of stretched across). I'm working on the top gold shell piece now and then the scope. Before painting, I'm going to use glue and tissue paper to coat the entire thing to hide the ugly glued (hot glue) edges and smooth the whole thing out (it's basically like paper mâché, you'll see) and then use a metallic gold and matte black, possibly some LEDs.
I will try to get better pictures once the entire gun is complete, after coating it with tissue paper, and after painting. Please leave some feedback!
[b]UPDATE[/b]:
No pictures, but today I almost finished! I finished the main gold body (the back one that's very rounded) and was able to achieve a rounded look, or as close as I'll get with cardboard. I almost finished the scope, so on Friday I will finish that and attach it and add any final details, and then it'll be done! After spring break (all next week) I will paint it and finally be done! I'll try to snap some pictures in my other art class tomorrow an post them!
[b]UPDATE[/b]:
So I stayed after school in my extra period today and was able to finish the Mythoclast! It's just cardboard, hot glue, and tape still, but it's done! I will hopefully finish it up the week after spring break (which is all week next week) and post the final pictures here! For now, here are some pictures of the final, unpainted gun. I've included some close-ups as well.
http://imgur.com/SjDlQy3
This one shows the very front of the gun. You can see the box-ish frame surrounded by some rolled-up cardboard. The barrel is just a tube that goes in the frame. The top piece that sticks up as well as the side panels are just flat pieces (the panels are bent, but made from a normal piece of cardboard). The bottom is layers of cardboard glued together with the two long pieces glued together (it was easier to do them separately).
http://imgur.com/tlgDaSB
Moving closer to the handle, you can see another basic shell piece (shells and plates are what I call the golden parts) and the magazine. The magazine is simply wrapped around the base of the handle with a smaller piece glued to each side. The tape creates a nice slope, giving it the rounded sort of look. Underneath the main gold shell was unfinished in that picture. I'll post a better one tomorrow.
http://imgur.com/mPZKLU3
And then the big gold shell, the main piece. Couldn't quite get that perfect round shape, but I got pretty close. It's hard to see in this picture, but basically there's a large flat piece (bent at a few spots) with some skirts going around and tape to hold it all together and give it its shape. I'm not sure how to describe it, so look below to figure it out. As far as the back bottom piece, it's just layered cardboard. Added more detail today, but like before, no pictures.
http://imgur.com/uhSaZ7b
And the scope. Pretty simple; it's just a toilet paper tube as a base with a few pieces glued on to provide the gold shell and black thingies sticking out. Couldn't find a good image of how it's connected, so I used an error I did in the front of the main gold shell to insert a "stand" for the scope to elevate it above the body and give the same look.
Here are a few pictures of the whole gun:
http://imgur.com/RhAzW5F - Whole gun
http://imgur.com/jYnxIV4 - First person view
http://imgur.com/bIitLWf - Another view of the whole gun
I hope you guys like it so far! I'll upload more pictures with the smaller details I added after these were taken, but that's about it for now!
Jeez, this post is getting long...
[b]UPDATE[/b]:
It's done! I've been busy and haven't had a chance to update this post, but my Vex is done! I'm very happy with the results and hope you guys are, too! Here are the new pictures:
http://imgur.com/RpPlj90
http://imgur.com/ZgZ3Lip
http://imgur.com/Tv7cGH8
Besides the paint, the only addition was the sights. I put transparent red "lenses" on to give it that opaque look it has before you aim (since it will be on display it makes sense). Other than that, I just painted the whole thing.
Thank you everybody for all the awesome comments and for putting up with a lack of updates! I hope you all like the final result!
I know how hard it can be to do 3d modelling, I'm currently taking an interest in it myself and all I have to say to you is no matter how many mistakes you make, hang in there, it's going to be difficult and you are going to -blam!- up lots but just keep going no matter how long it takes, you will learn a lot of skills from it and be on a path to becoming a graphic artist who is well respected for his work, I am
Currently working on learning how to make full 3d models of anime
Characters in blender, it took me 5 days just to make the chick im modellings face, but once I was done it felt so good to say "hey I made that", it also felt good to see that other people were enjoying my hard work as well and I really enjoy doing it no matter how tough it gets, I hope
You will end up doing the same
Your role as a moderator enables you immediately ban this user from messaging (bypassing the report queue) if you select a punishment.
7 Day Ban
7 Day Ban
30 Day Ban
Permanent Ban
This site uses cookies to provide you with the best possible user experience. By clicking 'Accept', you agree to the policies documented at Cookie Policy and Privacy Policy.
Accept
This site uses cookies to provide you with the best possible user experience. By continuing to use this site, you agree to the policies documented at Cookie Policy and Privacy Policy.
close
Our policies have recently changed. By clicking 'Accept', you agree to the updated policies documented at Cookie Policy and Privacy Policy.
Accept
Our policies have recently changed. By continuing to use this site, you agree to the updated policies documented at Cookie Policy and Privacy Policy.